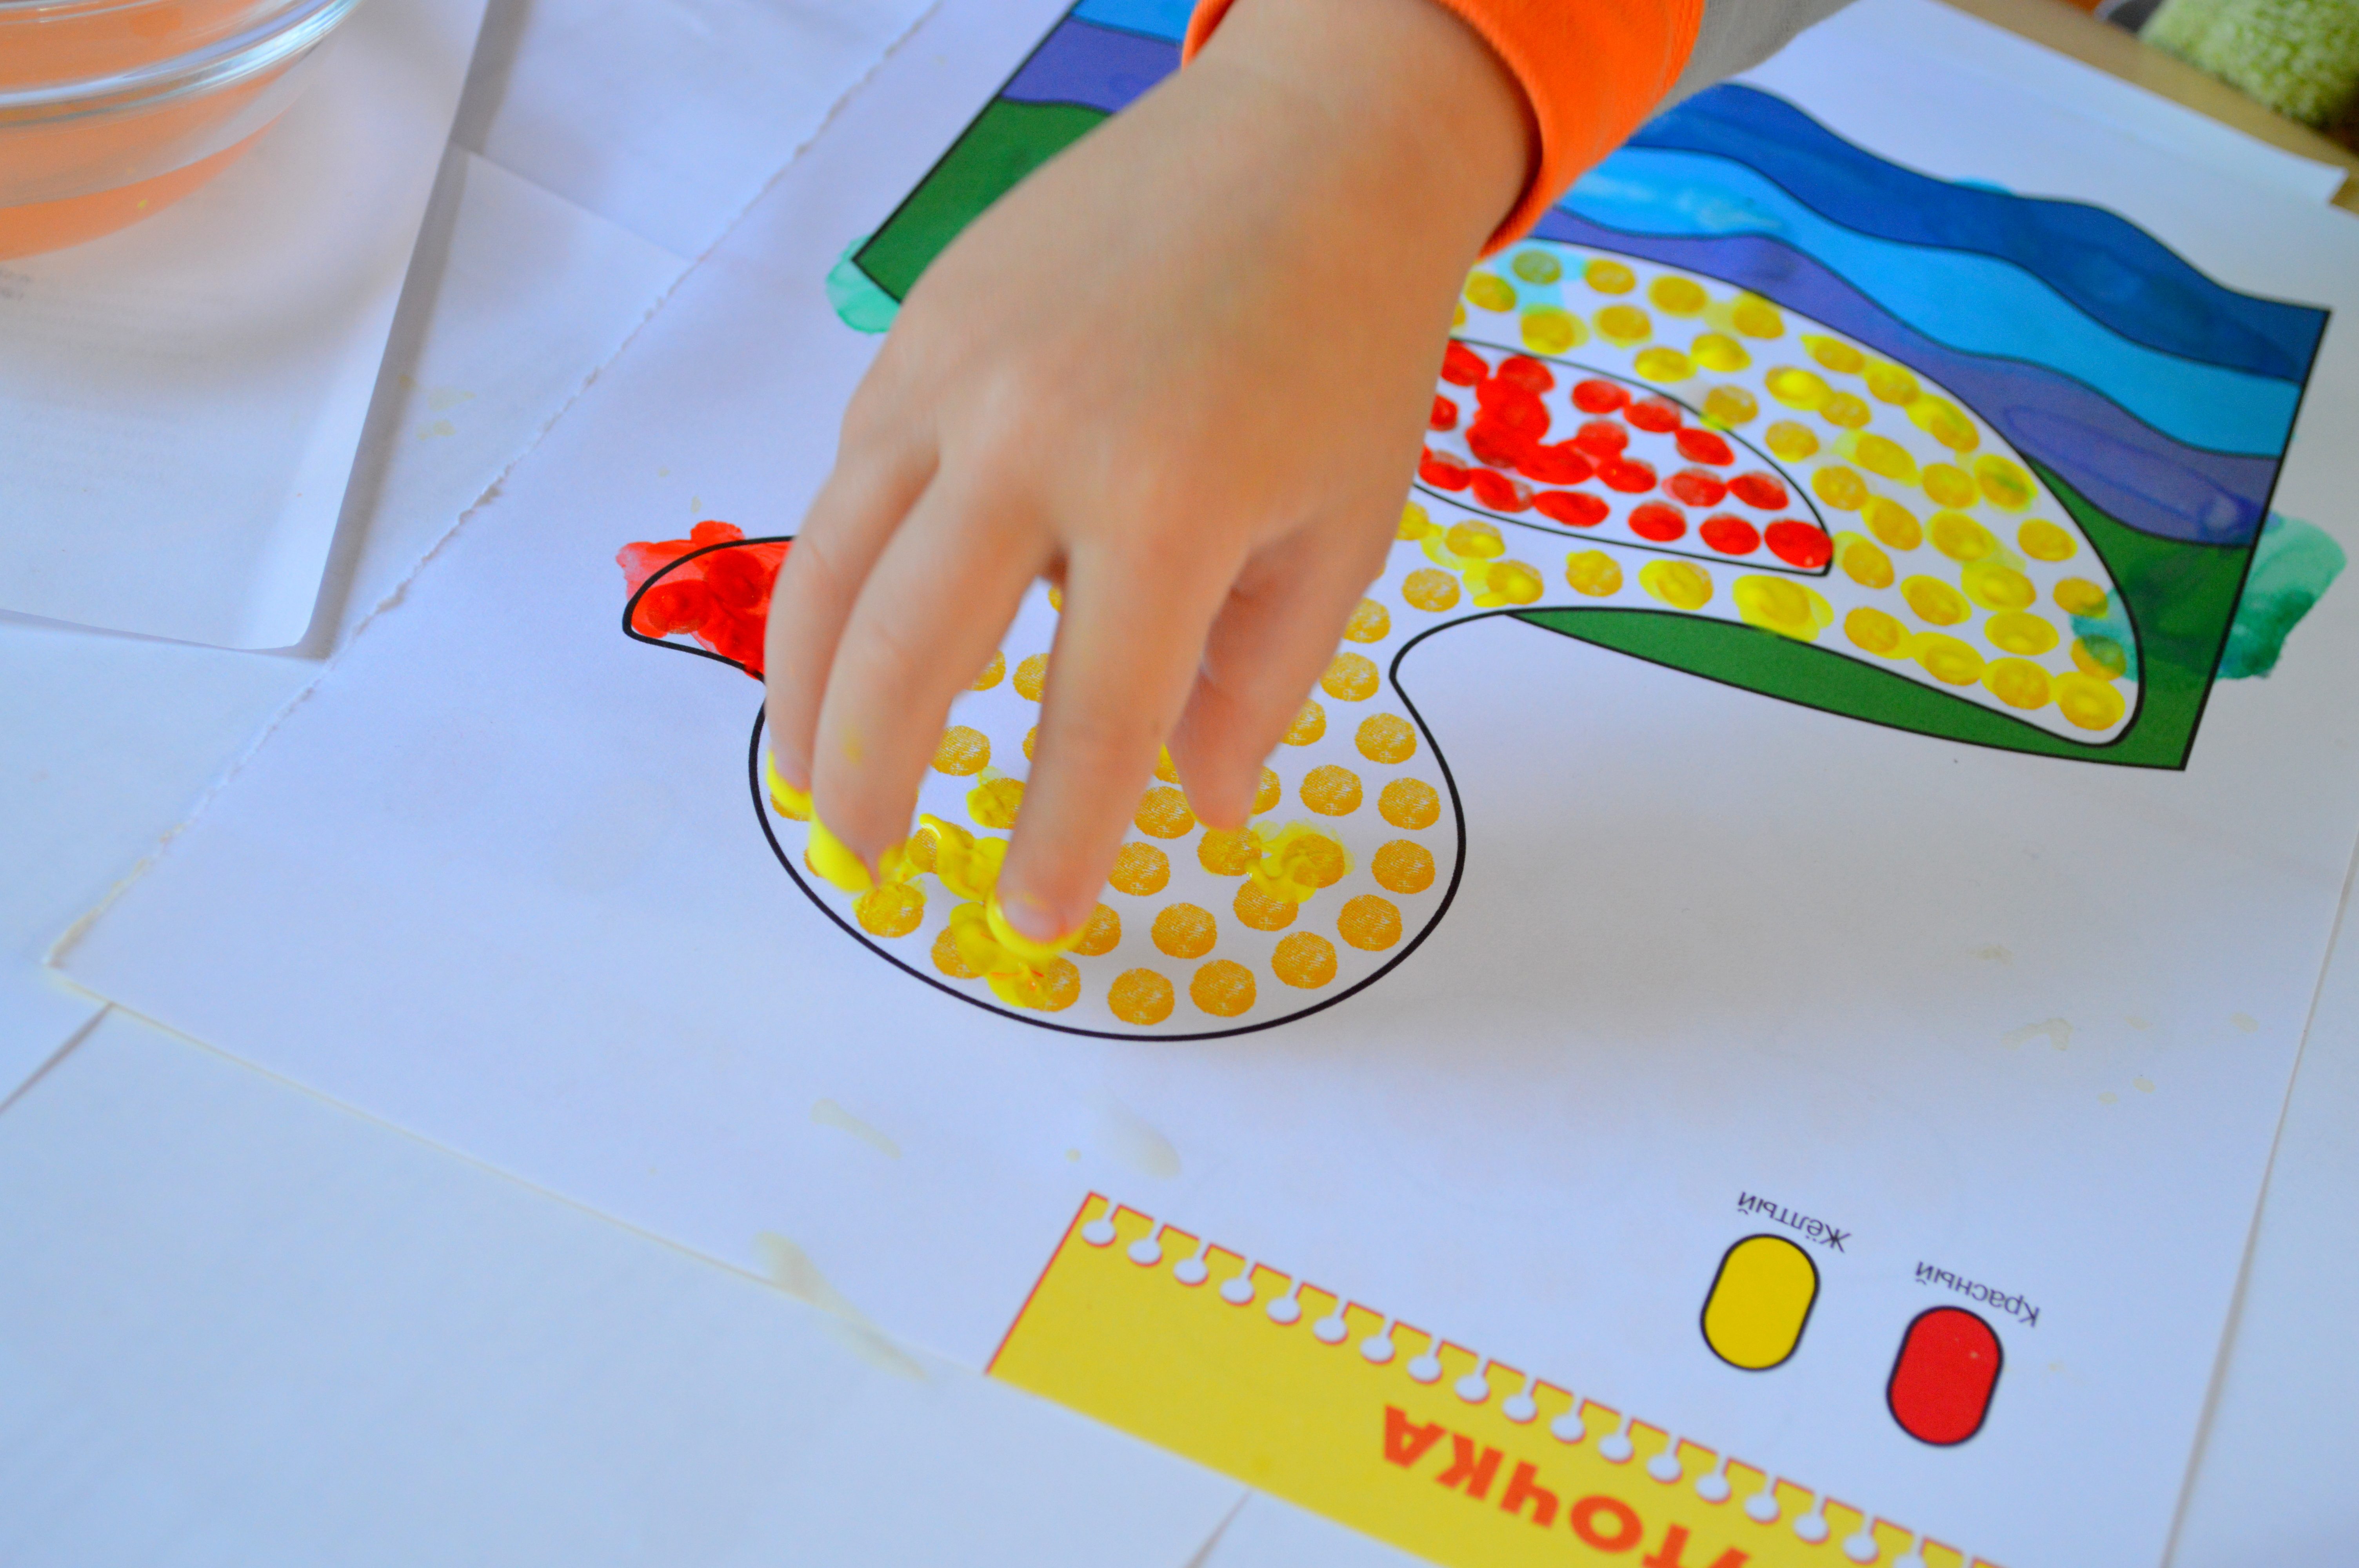
Try this easy duck finger painting activity for toddlers and preschoolers. Build fine motor skills, creativity, color recognition, and concentration through art.
Finger painting is one of those simple activities that can grow with your child. Before the first birthday, a baby may be interested mostly in the sensory experience—feeling the cool, slippery paint, touching it with their fingers, and spreading it across the paper. As children get older, the same activity can become a more intentional art experience involving color recognition, hand control, concentration, and creativity.
Around 2½ years old, a child may be ready to move from simply exploring the paint to creating a recognizable picture. In this activity, we painted a little duck, giving Adrian an opportunity to choose colors, use his fingers with greater precision, and follow a simple sequence of steps. The goal isn’t to create a perfect picture. It is to enjoy the process while giving your child plenty of opportunities to practice using their hands.

*First, Adrian painted the “water” using a paint brush.
Why Finger Painting Is Good for Young Children:
Finger painting offers much more than a fun way to make colorful pictures.
The direct contact between the fingers and paint provides a rich sensory experience while encouraging children to explore how their movements affect the marks they make.
Smearing, dabbing, tapping, and pressing the paint all produce different results.
For toddlers and preschoolers, this type of open-ended art experience can support:
Fine motor development as children move and control their fingers.
Hand-eye coordination as they guide their fingers toward specific areas of the picture.Color recognition as they identify and select different colors.
Concentration as they work through several steps to complete a picture.
Creativity and self-expression as they experiment with how to use the materials.
Sensory exploration through the texture and movement of the paint.
Independence when children are allowed to make choices and participate in preparing their materials.
The beauty of an activity like this is that the child doesn’t need to be sitting down for a formal “lesson.” The learning happens naturally while their hands are busy.
 |  |
*He then had to choose the corresponding paint color, squeeze it in a palette …
Finger Painting at Different Ages:
There is no single “right” age to begin finger painting. The experience simply changes as your child’s abilities develop.
Babies: Sensory Exploration
For a baby, finger painting is primarily a sensory activity. You can offer a small amount of child-safe, washable paint and let your baby explore it with their hands. At this stage, don’t worry about creating a recognizable picture. Let your baby touch, pat, smear, and observe what happens when they move their hands across the paper. Always supervise babies closely and choose materials appropriate for their age.
Toddlers: Exploring Movement and Color
Toddlers may enjoy making dots, swirls, lines, and handprints. You can introduce simple color names and invite your child to choose which color they would like to use. Keep expectations low. A toddler may spend five minutes exploring one color or decide that the most interesting part of the activity is mixing everything together. That’s okay. The process is the work.
Around 2½ to 3 Years: More Intentional Painting
By around 2½ years, many children are becoming more capable of controlling their hand and finger movements. This can make simple guided art projects more enjoyable. Instead of offering an entirely blank sheet of paper, you might provide a simple outline or picture and invite your child to paint specific areas. This is the stage when an activity such as our duck finger painting can become especially engaging.

Finger Painting Materials & Supplies:
For this activity, I prepared a simple duck picture and invited Adrian to paint it using his fingers.
What You Need:
- A washable work surface
- Paper with a simple duck outline or picture
- Washable, child-appropriate finger paint
- A small paint palette or shallow dish
- Paintbrush
- Watercolor paper or another sturdy piece of paper
- Apron or smock
I also recommend keeping a damp cloth nearby. Finger painting is much more enjoyable when you aren’t worried about every little drop of paint.
 |  |
the beak in red
How To Set Up Finger Painting for Toddlers Activity:
First, paint with water. Adrian painted the background “water” using a paintbrush. I liked beginning with the background because it gave him a clear first step before moving on to the finger painting. Using a paintbrush for the water also gave him a chance to practice a different type of hand movement before switching to his fingers.
Next, choose the color. Adrian had to identify the appropriate color for the duck, squeeze some paint onto his palette, and prepare his finger. This simple sequence involves several skills at once. Rather than doing everything for him, I gave him time to make the choices himself. Whenever a child is capable of completing part of an activity independently, allowing them that opportunity can make the experience much more meaningful.
Then, came the fun part – dip and paint – He dipped his finger into the paint and began painting the duck. At this age, you can gently encourage your child to stay within the outline, but don’t turn the activity into a test of precision. Young children are still developing the hand control needed for small, accurate movements. The goal is practice—not perfection.
After that, add the details. Once the duck was painted, Adrian added the beak in red and the eye in black. These small details gave him an opportunity to practice using just a little paint and directing his finger toward a specific part of the picture. You could also invite your child to add other details. Perhaps the duck needs grass, flowers, clouds, rain, or more water. There is no need to make every child’s picture look the same.
Finally, try painting with all fingers. Once Adrian had finished the more precise parts of the picture, I asked: ‘What about trying painting with all the fingers?’ This changed the experience from a more controlled activity back into sensory exploration. Children often enjoy the freedom of spreading paint across a larger area with several fingers at once. It can also be a nice reminder that art doesn’t always have to be neat or carefully controlled. And the ducky is done!

Montessori-Inspired Ways to Approach Finger Painting:
While traditional Montessori classrooms generally emphasize purposeful, hands-on work with carefully selected materials, you don’t need to turn every art activity into a formal Montessori lesson. Instead, you can bring Montessori-inspired principles into the experience.
Let Your Child Participate in the Preparation
Rather than setting everything up and completing the difficult parts yourself, invite your child to participate when appropriate. For example, your child might:
- Carry the paper to the table.
- Choose the paint color.
- Squeeze or spoon paint into a palette.
- Dip their finger into the paint.
- Complete the picture.
- Help clean the work area afterward.
The sequence itself becomes meaningful practical-life practice.
Offer Choices, But Keep Them Manageable
A young child doesn’t need twenty paint colors to be creative.
Two or three carefully chosen colors can provide plenty of opportunity for decision-making without overwhelming the child. You might say, “Would you like yellow or orange?”
Then allow your child to make the choice.
Demonstrate, Then Step Back
Show your child how to use the materials, then give them an opportunity to try.
Try not to correct every movement or take over when their painting looks different from yours.
The child should be the one doing the work.
 |  |
 |  |
What Skills Does Finger Painting Develop?
Fine Motor Skills: Finger painting encourages children to isolate and move individual fingers while pressing, dabbing, dragging, and spreading paint. These movements provide opportunities to strengthen hand and finger control that children will use in many other activities.
Hand-Eye Coordination: When a child attempts to place paint inside a particular area of a picture, they are coordinating what they see with how they move their hand. This becomes increasingly important as children develop greater control over drawing and other fine-motor tasks.
Concentration: Completing a picture involves staying with an activity long enough to move through several steps. For a young child, even a short period of focused engagement can be valuable.
Color Recognition: Choosing yellow for the duck, red for the beak, and black for the eye gives children a natural reason to identify and name colors. Instead of simply asking a child to memorize color names, the colors have a purpose within the activity.
Sensory Development: Finger painting is also a sensory experience. Children can feel the texture of the paint and notice how it changes when they press, smear, or spread it. For some children, this tactile experience is the most enjoyable part of the activity.
How to Adapt This Activity for Younger or Older Children
For Younger Toddlers
Keep the activity very simple.
Offer one or two colors and let your child explore making marks with their fingers, you don’t need an outline or a finished picture. Try narrating what your child is doing: “You made a big yellow dot.” and “Now you’re spreading the paint across the paper.”
For Preschoolers
Older children can work with a more detailed picture and practice painting within specific areas.
You might also encourage them to:
- Mix two colors to create a new color.
- Add a background.
- Draw additional details.
- Paint a family of ducks.
- Tell a story about their picture.
- Create their own animal picture.
For Children Who Don’t Like Messy Textures
Not every child enjoys getting paint on their fingers. If your child is hesitant, don’t force it. Start with a paintbrush, sponge, cotton swab, or another tool and allow your child to decide whether they want to touch the paint. The goal is a positive experience—not tolerating an uncomfortable sensory experience.

Common Mistakes to Avoid:
Expecting a Perfect Picture
A child’s painting does not need to look like the example. The developmental value comes largely from the child’s process of exploring, choosing, moving, and creating.
Giving Too Much Direction
If you continually tell your child where to put every color, the activity can quickly become an exercise in following instructions rather than creating.
Demonstrate the basic idea and then give your child room to work.
Offering Too Many Materials
More isn’t always better. A simple setup with paper, a few colors, and a manageable workspace can be much easier for a young child to use independently.
Rushing the Process
Give your child enough time to explore.
Sometimes the most valuable part of the activity happens after the “project” is technically finished, when your child continues experimenting with the paint.
Safety Tips for Finger Painting
Always supervise young children during painting activities and use art materials that are specifically labeled as appropriate for their age. For babies and young toddlers, be especially mindful that paint can end up in the mouth, eyes, or on other surfaces. Follow the manufacturer’s instructions and choose products intended for young children. Protect clothing, your work surface and wash hands after the activity. If your child has a known sensitivity or allergy, check the product ingredients before using a new paint.
Our Favorite Curriculum Resource:
I have been using the “School of Seven Dwarves” series with Julia and now with Adrian since he was born. The series is a collection of books organized by age, covering areas such as vocabulary, mathematics, art, logic, and other early learning activities. The duck painting above came from the art book, and we have been very happy with the series. The important thing for me is that activities like this don’t have to feel like formal schoolwork. Young children can learn so much through hands-on experiences that allow them to touch, move, choose, experiment, and create.
Summary:
Finger painting is a wonderfully simple activity, but there is much more happening than colorful paint on paper. The experience naturally changes as your child grows. Babies may simply enjoy the feel of the paint on their hands, toddlers can explore colors and different ways of making marks, and preschoolers can begin working with greater precision while making their own creative choices. And perhaps most importantly, your child doesn’t need to produce a perfect picture for the activity to be worthwhile. Set out the materials, demonstrate what is needed, and give your child the freedom to explore. Sometimes the simplest activities are the ones children return to again and again.
For More Finger Painting Activities,
Want More Hands-On Ideas Like This?
Sign up for the Monthly Kids Activities Plan (MKAP) and receive themed activities, printables, and video tutorials each month—so you can spend less time searching and more time playing!
Click here to learn more about MKAP.

Disclosure: As an affiliate, I may earn a commission or credit should you choose to purchase something, but there is no additional cost to you. I only share products and programs that I use and love!
RECENT BLOG POSTS

Montessori Language Materials | Fun Phonics Play at Home
Montessori Language Materials | Fun Phonics Play at Home builds easy reading skills without screens, so your preschooler stays happily engaged.

Montessori Math Resources at Home | Simple Screen Free Learning
These Montessori math resources at home bring screen-free joy to early learning, build deep number confidence, and use simple materials you already own.

Montessori Sensorial Materials | Simple Learning Through Play for Preschoolers
Discover Montessori Sensorial Materials for simple learning through play for preschoolers and help your child build focus, fine motor skills, and early thinking through hands-on learning.